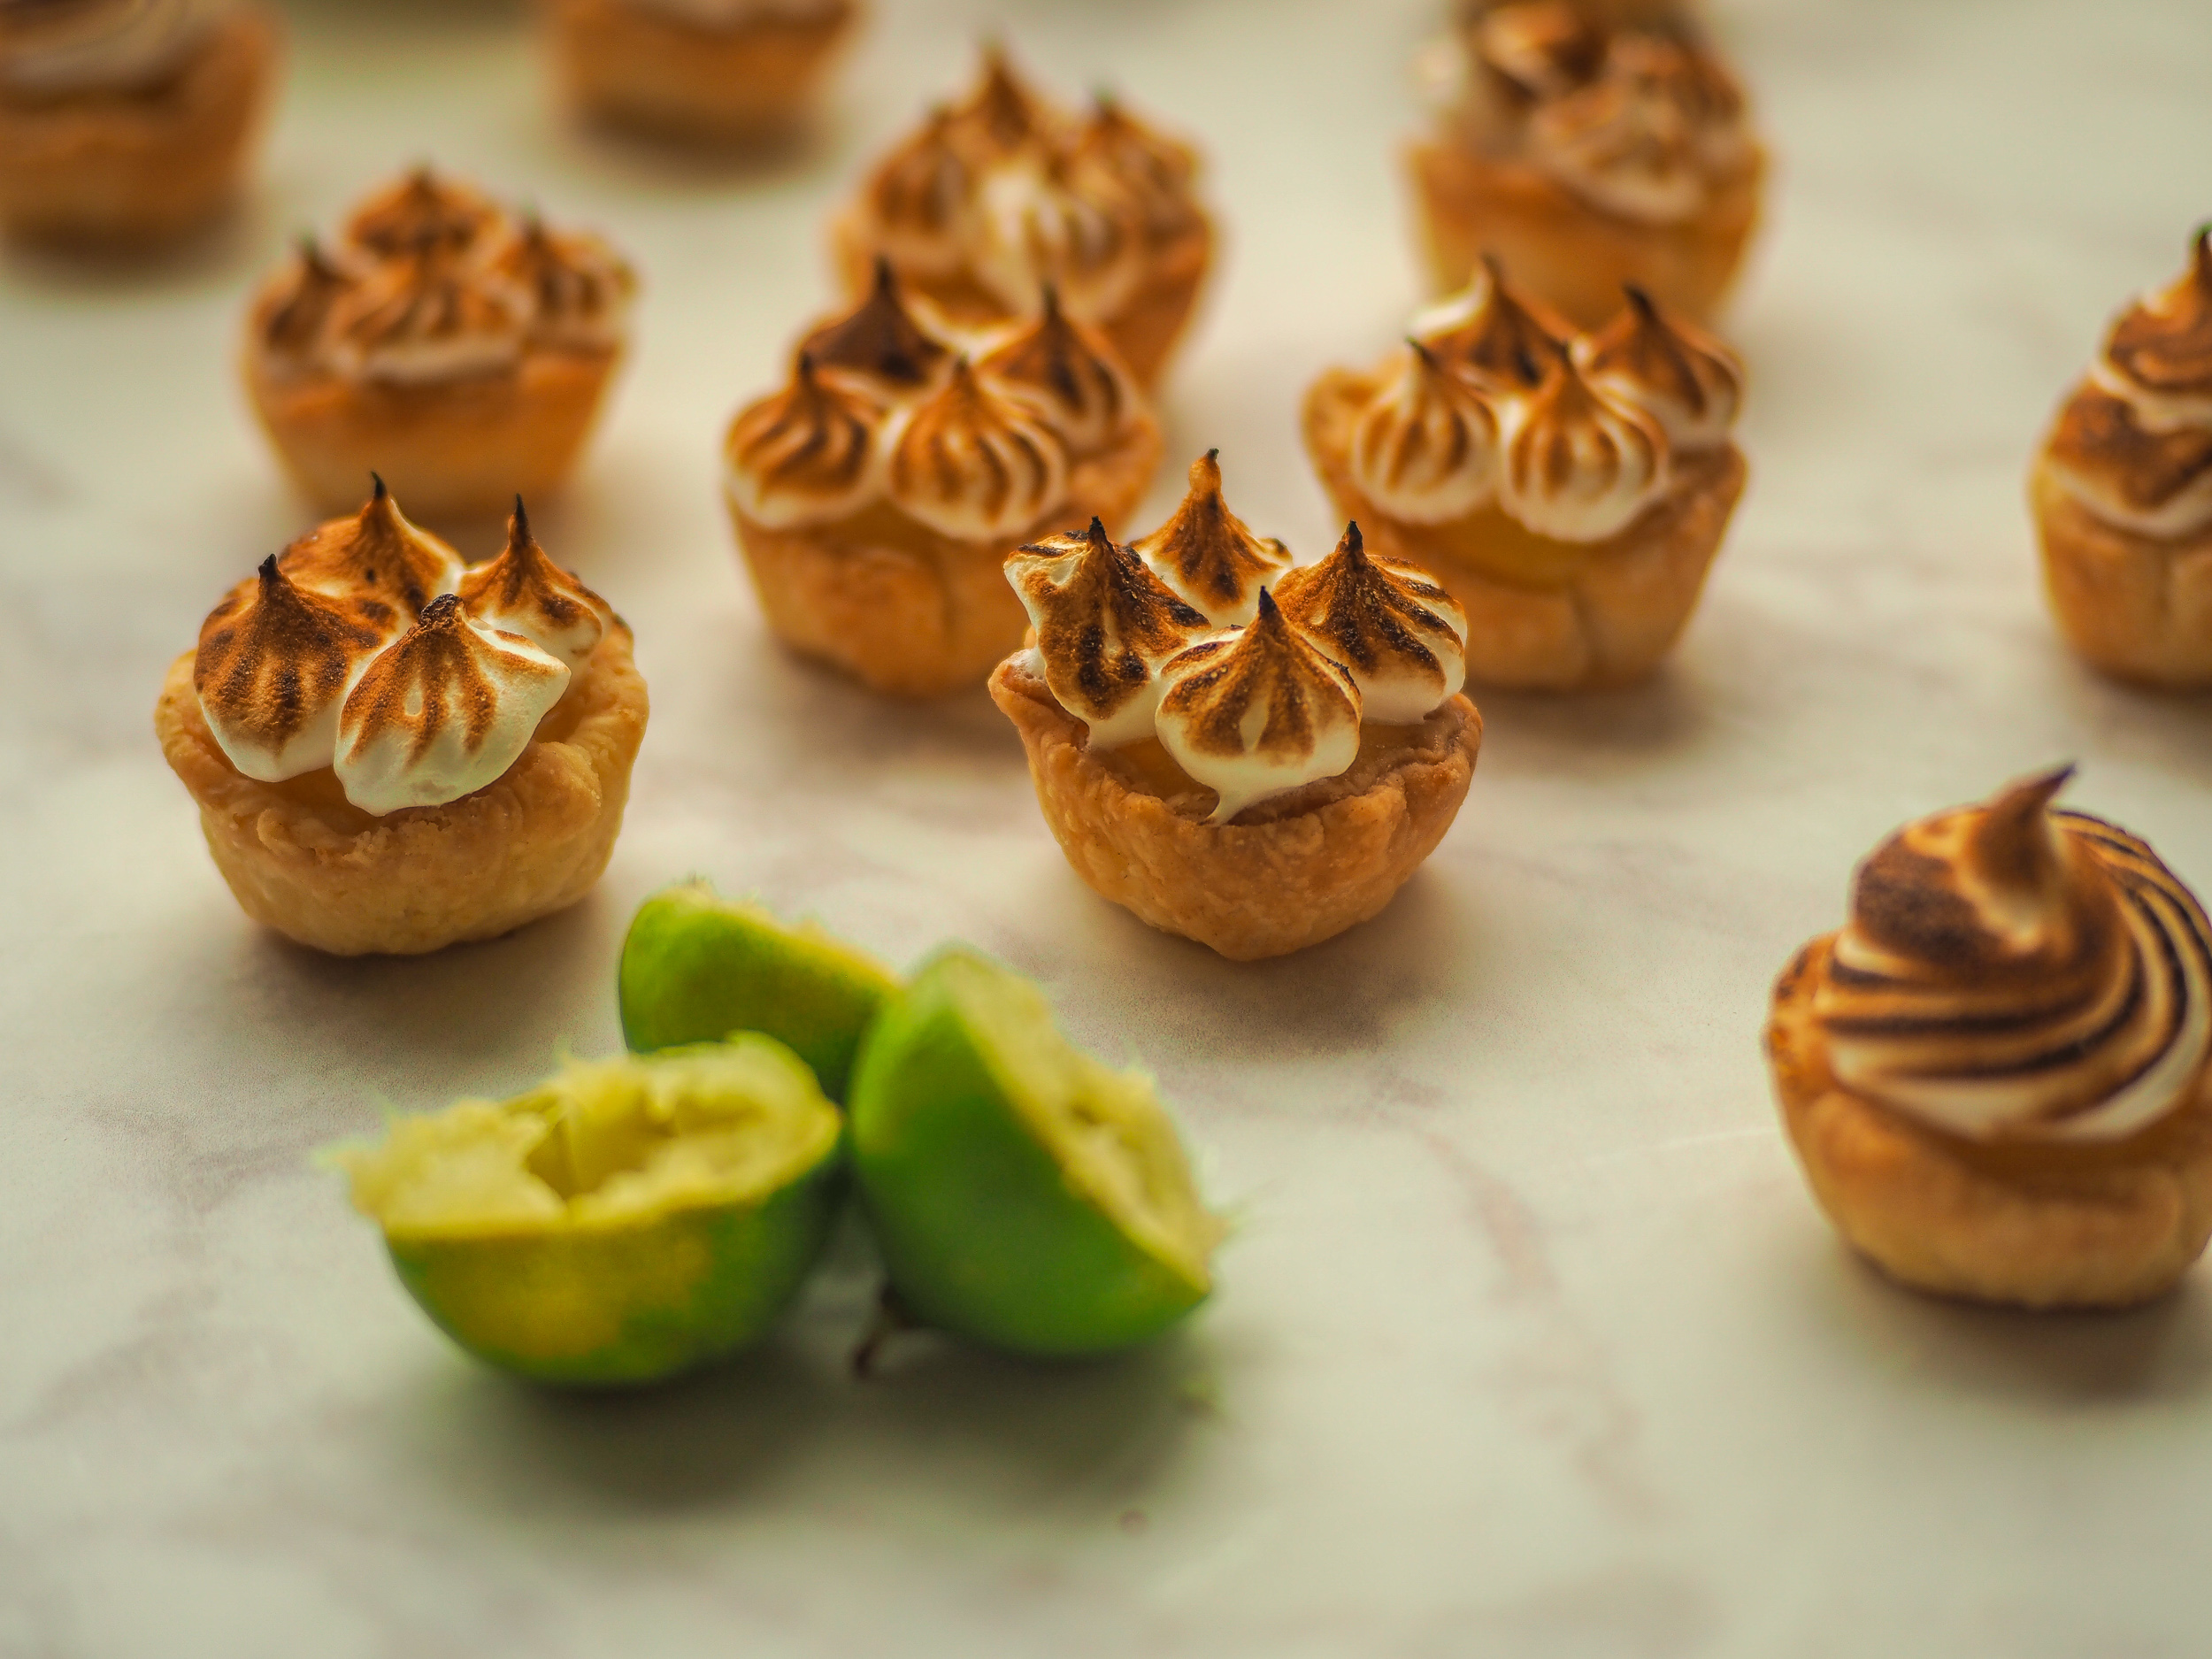
Key Lime Meringue Tartlets


I leaned REAL hard into the diminutive, cutesy thing on this recipe, didn’t I? As if tiny limes weren’t enough, I had to go and throw in tiny tart shells and tiny clouds of glossy meringue to festoon them with. You can barf if you want to, it’s okay, but keep in mind that this recipe actually solves a huge issue of pie (so un-portable! so hard to eat without utensils and plates!) and makes eating it almost too easy, like little pie-flavoured Flintstones vitamins.
Yes, these are a project, but I honestly think that it’s more in the way of time and fussiness rather than actual skill level needed. There’s no fussy draping of pie crust into a large pie plate, instead you use a cookie cutter to punch out circles that easily line a mini muffin tin. The lime curd is the type of thing that isn’t inherently hard, but you just need to have all the ingredients for it ready to go ahead of time. And meringue is really more a test of your arm strength than your baking expertise (unless using a stand mixer in which case it is literally just turning on the stand mixer). Patience and availability of time are all that really matter here. And you will LITERALLY blow people away with these suckers


Key Lime Meringue Tartlets
Adapted very generously from Williams-Sonoma (Home Baked Comfort)
Option for 48 tartlets or 24 tartlets (w/ extra curd + dough leftovers)
Ingredients:
Crust:
2 ½ cups all-purpose flour (measured correctly)
1 tbsp white sugar
1 tsp kosher salt
2 sticks (1 cup) unsalted butter, chilled
Key Lime Curd:
¾ cup white sugar
3 tbsp cornstarch
Pinch of kosher salt
2 tbsp finely grated lime zest (I used regular limes – zesting key limes is ludicrous even by my fiddly standards)
4 large egg yolks, beaten (save the whites for the meringue!!)
1/3 cup fresh lime juice (key limes or regular)
2 tbsp unsalted butter
Meringue:
4 large egg whites
Pinch of cream of tartar
Pinch of kosher salt
½ cup white sugar
Directions:
Start by making the crust. Fill a liquid measuring cup with ice water and set in the fridge until ready to use. Cut the butter into ½ -inch cubes and return to the fridge to firm up for 10 minutes after having been warmed by the knife and your hands. In a large bowl (preferably a wide one that is not made of metal) combine the flour, sugar, and salt. Sprinkle the cold cubes of butter over the flour mixture and start cutting them in using either 2 knives or a pastry blender. Continually clean off the knives or pastry blender to avoid butter build up. Constantly scoop and redistribute the mixture as needed to ensure that everything is getting mixed in and cut up evenly. When the butter is the size of small beans, stop cutting. This won’t take as long as you think, and quite frankly it is MUCH better to stop cutting too early than too late. The butter “beans” will inevitably look uneven and this is okay. Just make sure you don’t have any pieces bigger than the diameter of a dime (roughly). If I see quite a few bigger chunks amidst the otherwise adequate butter pieces, I will sometimes get in there with my hands (which I have run under very cold water and dried off) and just quickly rub the big pieces between my fingers to break them up.
Drizzle about ½ cup of your ice water (minus the cubes of course) over the buttery flour. Use a fork to gather the dough together. Keep adding cold water, 1 tbsp at a time to help the dough come together. I find that I usually need to add several spoonfuls of water to get to this point. Avoid the temptation to over-add water as this can result in shrinkage down the road. As soon as the dough can come together without then falling apart (but before it becomes sticky and over-moistened), knead it into a large lump. Divide the lump into 2 pieces, flatten each one into a disk, then wrap each half in plastic and refrigerate for at least 1 hour if not 2. Place the dough disks directly on a shelf on the fridge if possible for maximum chilling. If not using the dough within a day, place the wrapped disks in a freezer bag, remove as much air as possible, and freeze. I have used frozen dough up to a month or so after freezing and it’s been fine. Thaw the dough in the fridge for a day before using.
Once the dough is thoroughly chilled, preheat the oven to 375 degrees F with a rack positioned in the centre of the oven. Lightly butter 2 mini-muffin pans and set aside. Usually these tins have 24 divots – I only have 1 pan and didn’t need 48 tartlets so I buttered my 1 tin and saved the other dough disk for a single-crust pie later that week (remember you could always do the same, but instead freeze the remaining disk!)
Roll out one of the disks on a lightly floured surface. When rolling pie crust, ensure that you’re constantly turning the dough (to avoid parts of it sticking or getting rolled thinner than other areas) and lightly dusting any sticky spots with flour. You need to roll this dough out much more thinly than for pie; aim for ~1/8-inch thick. Use a round cookie cutter with a ~2 ½-inch diameter (or any round thing that could cut through dough with this approximate diameter) to punch out circles from the dough. If necessary, gather the scraps and re-roll the dough to fit more circles – you’ll need 24 from this disk. If making the full amount (48 tartlets), repeat the rolling and cutting process with the other dough disk to yield another 24 tartlets. Very gently press each circle into a mini-muffin cup to evenly line the tin. The dough will likely fold over itself in places and this is just fine – any imperfections actually make these little buggers look CUTER somehow. Chill the dough-lined tin(s) in the fridge for 20 minutes. Once chilled, prick the bottom of each tartlet with a fork a few times (to prevent unsightly puffing). Bake the tartlets until golden-brown, ~12-15 minutes. Let cool for 5 minutes, then remove from the muffin tin and set on a baking sheet. Let cool completely while you make the curd and meringue (for which you should have everything prepped and ready to use prior to starting).
Start with the curd, and whisk together the sugar, cornstarch, and salt together in a medium saucepan. Whisk in 1 cup water, then stir in lime zest and bring to a boil over medium-high heat, stirring constantly until the mixture begins to thicken. Place the egg yolks in a small bowl and whisk in a few spoonfuls of the hot sugar mixture (this tempers the eggs so that when you add them into the hot liquid, they don’t scramble). Pour the warm egg yolk mixture into the saucepan and whisk to combine. Bring to a simmer over medium-low heat, whisking CONSTANTLY (I mean it – really scrape those sides down!) The mixture should be fairly thick – if not, cook for another minute or so. Whisk in the lime juice and butter then remove from the heat. If your curd looks lumpy at all just pass it through a fine-mesh strainer and discard any solids left behind. Use a small spoon to divide the lime curd into the tartlets – don’t worry if it spills over the sides, it just lends to the devastatingly cute and rustic look.
Now move on to the meringue. In the bowl of a stand mixer fitted with the whisk attachment (or in a large bowl using an electric mixer), beat the egg whites, cream of tartar, and salt on medium-high speed until frothy. With the motor still running, very slooooooowly sprinkle in the sugar (make it take almost a full minute). Keep beating the meringue until it becomes thick and glossy. To test, lift up the beaters – the meringue should form a stiff peak that just barely curls at the end. Use a small spoon (or a piping bag if you wanna get fancy) to dollop the meringue on top of the tartlets in great glorious clouds. If you own a kitchen blow torch (some people do!) you can toast the meringue via FIRE, but if you are a regular human just pop them back into the 375 degree oven for 5-8 minutes, or until golden brown and toasted. Let the tartlets cool completely prior to serving. Release a little squeal of delight that surprises even yourself.
